Paul Teske
May 27, 2020
As we wind down the school year, we are left with uncertainty. Top of mind for most teachers is how to get ready for next year when it’s unclear what school will even look like. How are you supposed to prepare?
In my own work with educational organizations all over the US, the general consensus is to implement flipped classroom structures for the kids and for teacher professional development. And I’m seeing this solution echoed from other expert practitioners in the field, like Doug Lemov, of Teach Like a Champion fame. The flipped classroom model relies heavily on video content. And of all the tools currently on the market, Prezi Video offers a unique and easy video-making experience that leads to a very professional-looking product. Read on to learn how to create video lessons on Prezi Video, perfect for first-timers and teachers prepping for the next year.
In this Prezi presentation, I tackle how to get started with Prezi Video and illustrate how to develop increasingly more customized Prezi templates for your video lessons. Use this Prezi presentation as your guide, and read on for my quick tips for getting started with using video to support your online teaching and learning.
Get started making video lessons
Two of the easiest ways to get started are:
- Using one of Prezi Video’s templates
- Importing a PowerPoint presentation
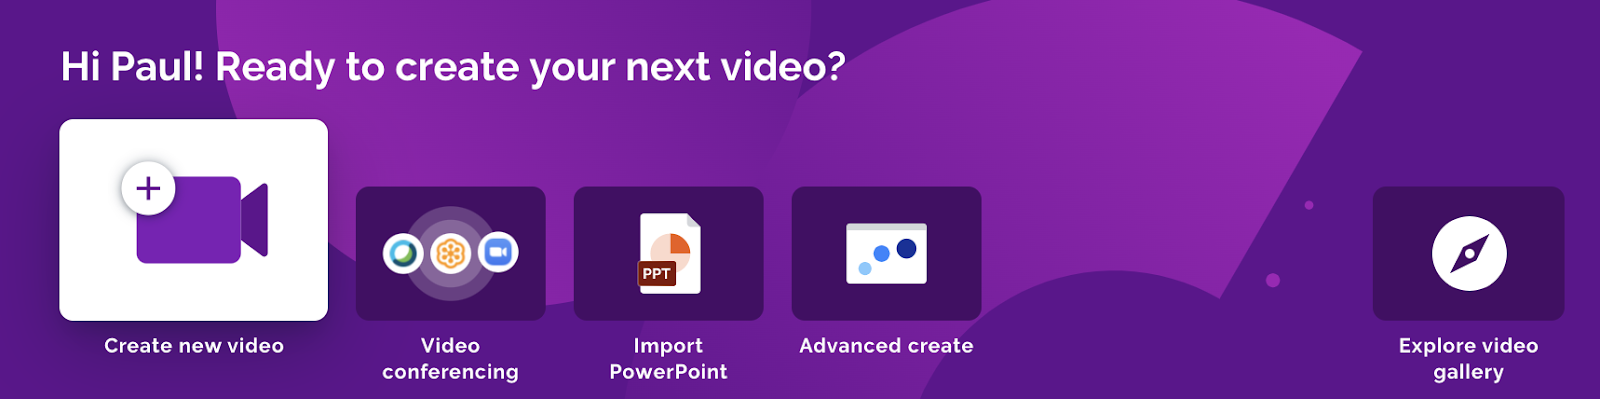 First log in to your Prezi account (or create one — it’s free for educators and students), and choose “Videos,” then select “Create new video” in the top navigation. The templates will come up and your camera will become activated. The wizard will guide you through the process, but basically, you first pick your template, add your content, and then record.
This video shows you how:
The second option, importing a PowerPoint file, is equally easy, but it requires you to first download the Prezi Video desktop app (which you access from within your Prezi dashboard). Again, just follow the wizard to import a PowerPoint presentation you’ve used with your class, select your favorite template, add the content from the file, and click record to show yourself speaking right alongside your content on screen.
This video takes you through the steps:
Level up
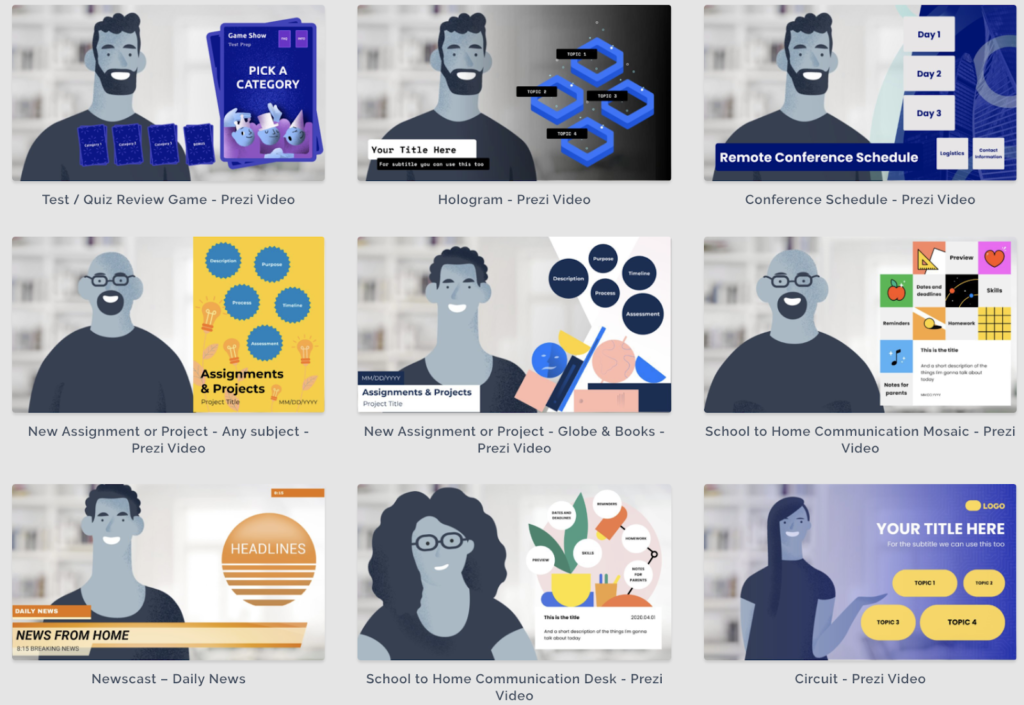
The “Advanced create” feature provides you with another easy method for making video lessons as well as access to slightly more complex templates. Simply select “Advanced create,” pick your template, add your content, activate your camera, and record. There are lots of templates to choose from, and some are several educational templates specially designed for use in your online classroom, including templates for creating a new assignment, sending video messages home for students or parents, and running a fun test review game. And any template can be easily modified. Here are more details on how to get started with Advanced create.
Create your own look
If you want to customize your video lesson with your own brand, look, or school mascot, either take one of your Prezi presentations and convert it to a video format or start fresh and build your own video template as a presentation. Starting with a presentation first and then turning it into a video template will give you the ultimate flexibility.
The key to making a good video template out of a presentation is to craft your template with your face in the editor, so you can see the placement of your visual elements as you create. When you’re ready, just start recording.
Share your video with your students
After you’ve made your video, edit as needed, add a proper title, add relevant tags, finalize your description so your students know what the video is about, and then share your creation. Some teachers are simply sending the videos to their students via the share link; others are putting the file into their learning management systems (LMS). We’ve seen other teachers aggregate their videos on a website where their students can access a library of videos to choose from. For instance, Jamie Ewing, who teaches in a PreK-5 school in the Bronx, established his own site, Mr. Ewing’s Location for Educational Mind Explosions, that directs students (and parents) to at-home literacy and STEM projects.
Other teachers are embedding their Prezi videos into a Prezi presentation that acts as a central hub for their assets, including videos, relevant documents, images, helpful URLs, and directions. Whatever method you decide for distribution, consider what’s the easiest way for your students to access it. Also think about how to best organize your content in ways that allow your students to easily make sense of your various video and textual assets, like readings and instructions.
With time and practice, you’ll be flipping your classroom with creativity and vigor. Check out how these teachers are using Prezi Video — you’ll be surprised how easy it is and how it can further your connection with students.
Sign up for a free live training, or check out the library of on-demand tutorials to get started.
Paul Teske, Teacher in Residence @ Prezi

Paul has worked in education for over 25 years as a teacher and in education technology companies. He is the founder of Education Impact Exchange. He taught English Language Arts, and ran after-school technology programs for K-8 students. Paul holds a Ph.D. in Education from the University of Washington.

